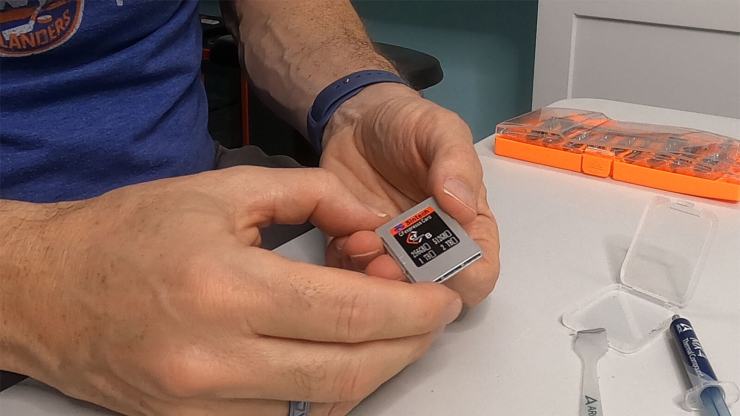
While I think almost everyone agrees CFexpress cards are enabling cutting edge cameras to capture images faster than ever before, these cards come with a hefty price tag. What if I told you there was a way to build your own CFexpress cards at a fraction of the price?
I built a 256 GB CFexpress card for under $100, and you can too.
Why CFexpress?
The CFexpress card was created in part to unify existing standards by using widely adopted common technologies. Many of these technologies are already in place in the average computer. One would assume this would have made CFexpress cards very affordable, but so far it hasn’t worked out that way.
Truth be told, it is hard to justify the price of a CFexpress card because they are so simple to build, anyone can do it.
Building your own CFexpress card
The supplies
CFexpress uses already in place standards such as PCIe 3.0 and NVM Express. This means building one is simply a matter of purchasing the correct parts. The first part we will need is the drive. Type B CFexpress cards use a small NVME drive inside them.
Most NVME drives in the M Key, 2230 form factor will work perfectly. These drives are common in small form factor laptops, tablets and other small devices requiring large amounts of storage. I purchased an PM991a OEM Samsung 256GB M.2 PCI-e NVME Drive on Amazon.
Next, you will need something to put the NVME drive into. There are several companies that produce CFexpress NVME adapters. The one I used is the Sintech Metal CFexpress Type-B M.2 NVME 2230 SSD Card adapter.
Next, you will need some thermal compound to apply to the NVME drive to keep it cool inside the case. I recommend using MX-4 by Artic.
Putting it together
Now to put it all together. First, apply a thin layer of thermal compound to the side of the NVME drive that does not have the label on it.
Next, place the NVME drive into the pin adapter that comes with the case.
Now place the drive with the adapter into the case. The case is keyed so the drive can only be installed one way.
Secure the top of the case with the four screws that come with the card adapter.
That’s it. You have built a CFexpress card!
Speeds against the competition
But how does it compare to a store bought CFexpress card? I performed several benchmarks, and the results just may surprise you. The home-built drive (left) edged out my ProGrade CFexpress card (right) in just about every test.


Troubleshooting
There were a few minor issues I had with the build, and they should also be noted. The Sintech adapter does not eject as easily as a store-bought card. It would seem the form factor is slightly off in some way so you will need to use a fingernail to pull out the card out of the reader or camera. This is minor but still worth noting.
Also, the home-built card ran slightly hotter than the store-bought card but well within acceptable tolerances hitting a top temperature of 55° C during tests. There may be other NVME drives that run cooler, and if you do build one, please let us know if you get a better result with a different drive.
Your own CFexpress card, at a fraction of the price
Overall, the drive works great in my Nikon Z series camera and has worked flawlessly since built. I know that this will scare some of you, but remember, the store-bought card is using almost the exact same parts you are in a home build. Since these NVME drives are available all the way up to 2 TB in size, you can save a lot of money making your own card!
Editor’s note: Joseph Nuzzo is a professional photographer specializing in wedding & family photos in the Sarasota area of Florida. Joe began his journey working in a camera store part-time while helping pay his way through college. The fun of picking up a camera just never seemed to get old. Learn more about Joe at ShutterSpeak.net or check out his channel on YouTube.


Why not just use a 256GB micro SD card in the proper adapter?
CFexpress is a different standard and form factor. CFexpress is far faster so you would slow your device down significantly. Certain cameras require a CFexpress card.
This is great info. I was wondering what kind of adapter to use. Thank you for sharing. I was going to look into the new xbox expandable storage and compare the r/w speed. Good job!
Specifically because of the host chip that SD uses slowing this down further, same reason NVME SSD is faster than a SATA->SSD. Bus bandwidth, and controller latencies all factor in.
Will it work with any cannon cameras that take the Compact Flash cards? Or just the ones listed on the sintech website
CF card is different from CFexpress card. It also works with Canon R3 and R5C.
Yes, very different. Different form factor as well. Only similar in name really.