

Looking for tools for more consistency, efficiency and accuracy in your photographic work? Then you should discover the new SpyderX Photo Kit! Announced this morning, the kit includes a very unique gray card, a camera color corrector and an expert monitor calibrator. Let’s see how this works.
Datacolor SpyderCUBE
Forget about the flat gray square, here’s a smarter gray card. The SpyderCUBE provides complete light information to analyze overexposed/underexposed areas as well as to measure color temperature. Basically, it helps us achieve rightly exposed pictures with great contrast and accurate colors.

Photoshoot
Use it at your photoshoots by placing the device in front of your subject with the black facing the camera (as shown in the picture above). Take a picture. This image becomes a reference for the upcoming post-processing workflow.
Post-production
Once your photos imported, open the reference image (with the SpyderCUBE on it) in your go-to editing software. Use the eyedropper tool to set white balance and the cursor to measure the values of white and black areas. You can then save these new settings and apply them to all the other pictures with the same lighting situation.
Watch the step-by-step tutorial to learn how to use the SpyderCUBE for white balance and contrast!
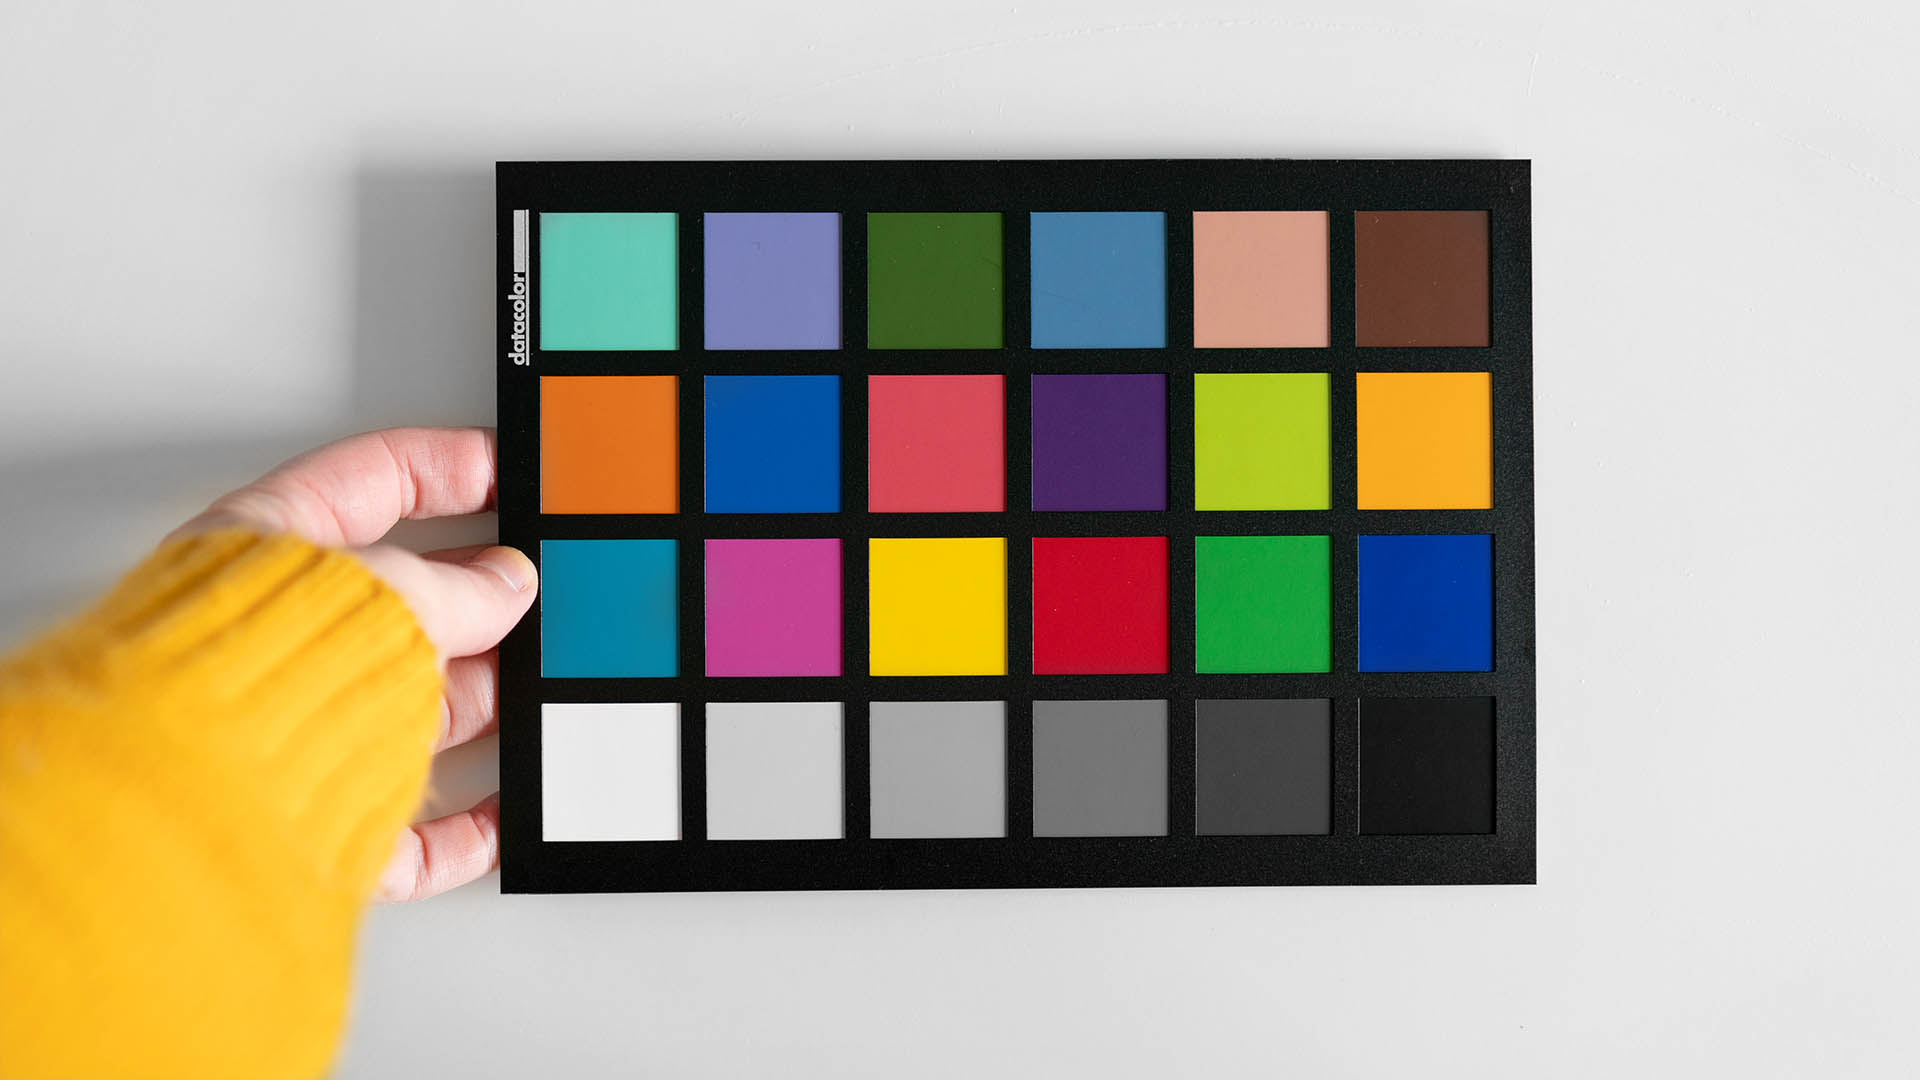
Datacolor SpyderCHECKR 24
This card contains 24 patches of the most common colors. By doing test photos and uploading them into Datacolor’s software, we can create a unique profile to our photographs. In other words, SpyderCHECKR 24 does an automatic color correction for true to real-life results.
These profiles can be used in Lightroom, Photoshop, Hasselblad Focus and Blackmagic DaVinci Resolve (for video editing).
Photoshoot
Hold the SpyderCHECKR 24 in front of your subject, colors facing the camera. Take a test photo. This image becomes a reference for the software.
Post-production
Importing the test image in the SpyderCHECKR software will automatically create a custom color calibration profile. This profile can be saved to be used among others in Lightroom and Photoshop.
This makes a great starting point as it ensures colors are right on. You can then edit your pictures based on your needs, by either staying true to these colors (thinking about all of those beauty and fashion photographers out there) or creatively mixing things up.
Here’s an easy and comprehensive guide on how to use the SpyderCHECKR 24 for accurate and consistent colors.
Datacolor SpyderX Elite
The SpyderX Elite is one of the fastest most accurate monitor calibration tools on the market. It calibrates a monitor under two minutes (which is indeed VERY fast).

What is monitor calibration?
To calibrate a monitor is the process of measuring and adjusting the colors of (in our case) a computer screen to match a common standard.
How is it useful?
A calibrated monitor is one of the most important features in a photography workflow. There’s no point in doing color calibration and custom color profiles if we don’t even see the result the way it should be. In a perfect world, every single screen would be calibrated and everybody would be using the exact same color space. As this sure is an impossible situation, monitor calibration still should a must for any professional printing or selling their images.
How to use it?
Download the free SpyderX Elite software, hang the device on your monitor and plug it into your computer’s USB port. Adjust your preferred settings and you’ll have a perfectly calibrated screen in less than 120 seconds. To help you get started, I suggest you read this friendly installation guide.
Personal thoughts on the SpyderX Photo Kit
I used to have other kinds of gray cards and monitor calibrator before Datacolor sent me this kit. To be honest, I wasn’t using them very much. I either forgot about it or didn’t have (or wanted to take) the time to go through the calibration process.
As I’m doing more and more prints, I realize that I really need to be more thorough with my editing workflow. I’ve never had a bad experience (no prints turned out to look completely off) but I also know I’m currently playing with fire. I think that using these three tools both during my photoshoots and my post-processing stages could help me achieve better and more consistent results.
I’ll be giving a try to this new SpyderX Photo Kit within the next weeks and come back with my experience in a new article. Stay tuned!


That is very cool. Great overview!
Thank you so much Jemma!! :D