

Photographing people in low light often means high ISO, and high ISO often means noisy images. Depending on your camera, noise can be quite significant. Radiant Photo paired with DxO PureRAW3 have noise solutions wrapped up. Let’s compare noise reduction in Radiant Photo and DxO PureRAW3 — and how the two work together.
Now, noise isn’t always a bad thing: You shouldn’t assume that you have to do everything you can to remove it. But when you’re working with underexposed or low light photos, using a powerful noise reduction tool like Radiant Photo or DxO PureRAW3 can dramatically improve the quality of your photos. Honestly, modern noise reduction makes me feel like I took these photos with a whole new camera.


Save detail in noisy photos with Radiant Photo advanced noise reduction
Radiant Photo has the fastest noise reduction engine on the market. It’s got you covered not just for ISO noise in digital photos and grain in scanned images, but can fix JPG compression artifacts and moiré pattern effects as well.
First I’m going to drag-and-drop my batch of, let’s face it, really poorly exposed images, into Radiant Photo. Radiant Photo immediately processes the images. I can tweak the noise reduction in the Detailed Edit panel:
Detailed Edit > Details > Noise

Because Radiant Photo processes noise automatically, it will only apply to photos where noise is detected. One of the five presets will be selected based on the content of the photo:
- Default — this is effective for most general situations
- Portrait — this setting avoids a plastic, overprocessed look while removing noise and maintaining natural color composition
- Night — this preset is optimized for images where there are dark areas and brightly illuminated, detail-rich areas
- Camera Phone — this adds a special correction for the grainy quality of camera phone pictures
- Strongest — this forces the maximum reduction for really noisy images
You can Sync all your settings across the batch, with Radiant Photo only applying the noise reduction where needed. Radiant Photo noise reduction will remove noise by about 2-3 stops. In other words if your photo was taken at ISO 3200 then Radiant Photo can make that look more like ISO 400-800.
Why can’t I turn on noise reduction in Radiant Photo?
If the setting for noise reduction is grayed out in your Detailed Edit tools, then it means that Radiant Photo hasn’t detected any noise in that image. Noise reduction is only applied if needed.

This makes syncing across a batch safe and effective because the noise is only addressed when its needed.


Save detail in noisy photos with DxO PureRAW3 before making photos pop in Radiant Photo
DxO PureRAW3 has export to Radiant Photo built-in as an option after processing. To take advantage of the DeepPRIME and DeepPRIME XD algorithms, you can run your photos through DxO PureRAW3 as a first processing step.

While Radiant Photo can be used as a stand-alone editing solution, or as part of your existing workflow (e.g. with Lightroom Classic), DxO PureRAW3 is a tool with a specific purpose. Its job is to improve your RAW photos before editing. It has simultaneous AI-powered denoising and demosaicing which yields exceptional results to save detail in noisy photos.


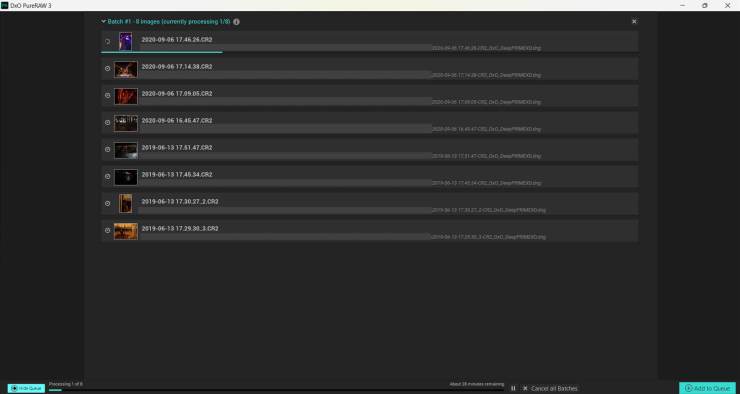
Import photos into DxO PureRAW3 and process with DeepPRIME or DeepPRIME XD
To process your photos in DxO PureRAW3 before finishing in Radiant Photo, choose the option to Export to Radiant Photo. I processed these photos with DeepPRIME XD. The process time makes this a press Start Processing and come back later kind of task. The results are worth it, though.

For a little more on the difference between DeepPRIME and DeepPRIME XD, have a look at this article.
View results of DxO PureRAW3 in Radiant Photo after noise reduction
After processing, DxO PureRAW3 will prompt you to open Radiant Photo. The photos will be instantly processed with Radiant Photo Smart Presets. Then as usual you can get creative with LOOKs and Color Grade to make your photo perfect. I’m keeping it simple here and going for a real color look as much as possible.
I’m asking a lot here with some of these photos. Very dark, very underexposed, and in tricky lighting. Radiant Photo and DxO PureRAW3 do a good job of saving the detail in these noisy photos.
Finishing off with straightened angles after saving the detail in noisy photos
One last step to finish off my photos: I’m going to import them into Lightroom Classic and straighten angles. The AI engine that powers Radiant Photo works best with square pixels so there is no straighten tool in Radiant Photo (however, you’ll find Crop in the Detailed Edit panel).

Depending on your workflow, if you’re starting in Lightroom Classic then outsourcing your problem children to Radiant Photo and DxO PureRAW3, it’s worth noting that the DxO PureRAW3 plugin for Lightroom Classic can process your RAW files in the background while you work on other tasks.

DxO PureRAW3 also makes precise lens-specific and camera-specific adjustments to sharpen your images, so it’s a powerful tool to have in your workflow.
Comparing noise reduction in Radiant Photo and DxO PureRAW3
Let’s finish up by taking a look at one of my images in depth, comparing the noise reduction in each. I’ve zoomed in to 100% here and cropped the same section for comparison.
Original RAW: straight out of camera, with no processing.

Processed in Radiant Photo only.

Processed in DxO PureRAW3 only.

Processed in DxO PureRAW3 and then finished in Radiant Photo.

Let’s look at these four variations again as comparisons. First comparison is the original RAW versus the DxO PureRAW3 processed RAW.


And now let’s look at the original after processing in Radiant Photo only, versus the DxO PureRAW3 version after Radiant Photo processing.


Depending on what your noise problems are, Radiant Photo might do the trick, or you might need the deeper attention of DxO PureRAW3.
Noise reduction tech today can bring new life to old photos and old cameras
It’s impressive what you can achieve with Radiant Photo and DxO PureRAW3 to bring clarity, detail and pop to grainy, underexposed photos. I find it particularly useful for photos taken on my older cameras. With sensors that are not up to modern standard it’s nice to be able to get more use out of my images with cutting edge noise reduction tech.


