

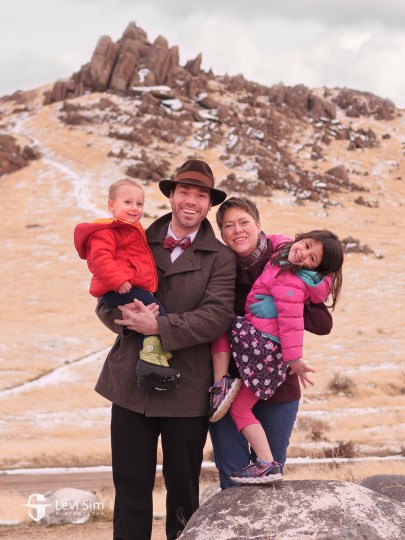
Selfies with your phone are fun, but you can do so much if you use your camera. You can control the depth of field, lighting, lens choice and you can place the camera somewhere other than arm’s length.
All cameras have a timer built into them, and many of them allow you to take three shots on a single timer setting so that you have more opportunity to get into the frame and get everyone looking in the same direction. But even better than using the timer is using the time-lapse mode — especially for photographing your own family.
Time-lapse settings
The time-lapse or interval shooting option in your camera allows you to take picture after picture all a certain time apart, like every second, or every five seconds. If your camera can do this, it is fun to experiment with and create moving landscapes, etc.
There are loads of inspiring video examples of time-lapse you can watch for inspiration, like this one from National Geographic.
There are a few things to pay attention to when you record a time-lapse for a selfie.
1. Use Manual mode
You don’t want the exposure to change when you go into the frame, so use Manual mode. If not Manual mode, I’d recommend Aperture Priority Mode.
2. Remember focus
If you are photographing your family, set the focus point on someone already in the frame, probably the person nearest the camera, and then switch it to manual focus so that the focus doesn’t change between frames. I often use the Face Detect setting so that the camera tracks with the faces in the frame. When I’m photographing myself, I use the Face Detect and leave it on autofocus so it can track with me. As long as you don’t move too quickly between shots and keep your face in the frame, the camera should be able to track with you and keep your face in focus.
3. Set the interval
A one-second interval is best so that you get plenty of frames and don’t miss the in-between frame expressions from your family. When you’re in the menu, you’ll probably see settings for the interval (use 1 second) and for the number of frames, which you should set very high. It’ll only take pictures for as long as you leave it running, but you don’t want to set the limit low and not let it shoot enough frames.
4. Use the Interval mode, not the Movie mode
Some cameras, like my previous Nikons, can create a time-lapse video or record the individual frames. On the movie mode, you end up with a video file which is fun but won’t make a large wall print. Using the interval mode you end up with all the frames and they are all full-resolution photos so you can use any one of them for a print, and you can still create a time-lapse afterward. In fact, with my Lumix cameras, I can get all the frames and create a video in-camera — the best of both worlds.
5. Save some space
Make sure your memory card has enough room for your selfies.
6. Be ready to be steady
I always have a tripod in the car with me, but I also carry my Playpod around so that I can make a Selfie-lapse with a steady platform anywhere.
Time-lapse saves time
Making a time-lapse for your selfies will save you lots of time because the camera just keeps shooting while you try different expressions and poses. My kids do pretty well with it because they can make faces the whole time — I only need one frame with a semi-decent smile.
Using the timer, you’ll constantly run back and forth to the camera to restart the timer and try to dive back into the frame before it goes off. Remote controls work pretty well, but you’ve got to hide your remote and you end up with lots of frames of your hand in funny positions.
Making selfies with your best camera will allow you to make your best selfies. Get the camera settings worked out and then spend a few moments working on different expressions and you’ll have them all recorded. Using this mode when photographing your own family will also give you terrific results.
If you’d like to learn all there is to know about time-lapse, check out this course on ThinkTapLearn.
Portrait Tips come out each week, and you can see them all right here.


I really learn a great deal from you photo tips because I am a part time amateur photographer. They help me reach back and update the memory banks for times when I want to spend shooting photos. Keep the tips coming! By the way the title of this article needs a spelling correction. Sorry, I didn’t want to start off with that but I know you would want someone to let you know. Cheers!
Thanks for pointing out the misspelling. It’s fixed now!