

Over time, the colors that monitors produce can change ever so subtly. Yes, even LED monitors. It is easier to recognize on multiple monitor setups since you have a direct comparison.
Whether viewing on my Apple LED monitors at my workstation or my Dell LED monitors at home (all set to the same color display profile), facial tones now look different shades on all the monitors as the years have gone by.
When colors start to go bad, you can’t be 100% certain about what you are retouching or color correcting. If your monitor isn’t producing accurate results, then there could be a fine line between someone’s face going from a ghostlike white to reddish sunburn appearance. What about if you are working with a team of designers on different monitors and then exporting files to a print vendor? With so many variables at play, you can see how poor color representation in just one part of the process can have a big effect.
Some people have told me that their audience doesn’t calibrate their monitor, so what does it matter? While that is true, there is a wide range of how uncalibrated monitors display images. They can be too bright, too dark, too warm or too cool. Therefore, it is even more important that your image be perfect so that you can fall right in the middle of all those variables.
You took the time to take the perfect shot, so you should ensure that your viewer sees those perfect colors the way you did. This begins with proper monitor calibration to minimize guesswork.
Monitor calibration is easier than you think
Color profiles can be confusing. Like most people, you’re probably thinking that monitor calibration is a tedious, difficult, or time-consuming process. This is no longer the case with current technology. My tool of choice is the Datacolor SpyderX Elite, which I was provided for review. It checks all the boxes: It’s easy to use, fast at calibration and provides accurate results.

How easy is it?
Once you turn on your monitor (have it on for at least 30 minutes, disable auto features, and reset to default settings), download and install the Datacolor software using the information provided in Datacolor box. Then, it’s as easy as 1, 2, 3!
First, plug in the SpyderX Pro or SpyderX Elite into a powered USB port on your computer and remove the lens cap.

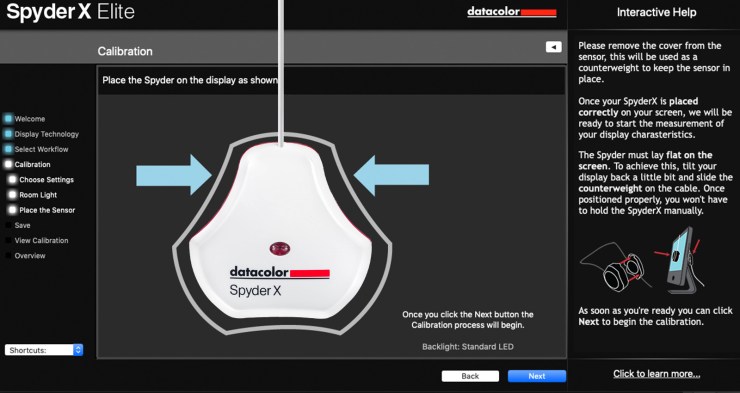
Second, hang the SpyderX Pro or SpyderX Elite over your monitor. Use the lens cap that is attached to the USB cable as a counterweight. The software guides you, as shown below.
Third, you calibrate! The software walks you through the calibration steps and provides help on any features you may have questions on.
That’s it! It took me less than four minutes to calibrate and match BOTH of my Dell monitors at home. That’s right — with this system, you can calibrate multiple monitors. When calibration is finished, you can toggle between the uncalibrated and calibrated results. I was able to see the subtle red adjustment in my main monitor and the secondary monitor was greatly improved to match the main monitor.
Why does it work so well?
I believe the SpyderX to be accurate because of their lens-based color engine technology. I’m no engineer, but the sensors seem to have a greater light sensitivity which can offer more precise screen color, shadow detail and white balance calibration.
What makes the SpyderX Elite so elite?
The SpyderX Pro is a great tool for the serious user. The SpyderX Elite, three years in the making, expands upon this by offering extra features of interest to professional photographers or videographers seeking advanced calibration.
You’ll get more tools for greater analysis of display quality. You’ll also be able to calibrate an array of devices, such as projectors, and be able to perform display matching across multiple different devices. As a videographer, I appreciate the video calibration targets. Finally, one of my favorite Elite features is the visual fine tuning for side-by-side display matching.
When colors go bad, turn to monitor calibration to keep your perfect images looking perfect throughout your entire workflow.


the SpyderX Elite is not as good as the X-Rite i1Display Pro ones.
Thank you for your engagement on this post. Are there any specific reasons you prefer the X-Rite Pro? Although they both have similar features, I like the fact the SpyderX Elite is filter-free and calibrates much quicker. But like anything else, it depends on your preferences, workflow, and monitor.